Monday, May 30, 2016

Progress Made

The tablet weaving project is moving along, albeit slowly. It took me over an hour to recover from the broken thread but I finally got everything untangled and tied off so that I could continue. You can see by the photo that progress has definitely been made.

However, continuing issues with the tensioner have been challenging to overcome. It keeps requiring 'bandage repairs' in order for me to keep moving forward.

The problem is that the screw is stripped. The soft pine wood it is made from was not designed for the amount of usage mine gets.

So, I have to keep stopping and attempting to tighten it up as best as I can. Several wooden toothpicks and a wee bit of my sanity have been sacrificed along the way.

On the weekend, I went to Home Depot and purchased a hardwood dowel and the hardware to make a few more tensioners. Since I don't have the tools or expertise myself, I went to visit my youngest son.

After showing and explaining to him what I needed and why my current tensioner was no longer working for me, he agreed to make me a few.

Of course, he has a 'better' construction idea than mine and I'm okay with that as long as they work. It is way too frustrating to have to keep fixing this old tensioner every time I turn around.

By tomorrow evening, I should have the new ones. I can hardly wait!

Tuesday, May 24, 2016

Project Woes

I decided to change creative directions in order to get back on track. I've been stymied lately and really need to get myself motivated again.

So, I turned to the inkle loom. My Etsy shop could use a few more pieces of tablet woven trim. It's been awhile since I've made any new ones and several have sold over the last few months.

This project has been fraught with problems from the start. I selected burgundy and bright yellow crochet cotton to work with this time, a lovely combination.

I chose a very simple pattern that I've used before. I still consider myself a beginner at weaving but I have had success with this design before so it seemed like a good choice.

Then my troubles began. I started warping up the loom only to discover that the tensioner was not doing the job it was hired to do and I ended up having to cut my losses on that thread. I hate wasting supplies but there was no way to recover from it.

I had to get a friend to fix the tensioner for me before I could make another attempt at it. I began to warp up the loom once more. Step one  was completed successfully this time. Hurray!

Trying to establish the pattern is always a bit of a challenge for me. There was a lot of frustration and concentrated effort along the way but I finally got it going the way that I wanted.

I have about 6" of a 9' piece done, when one of the threads break! Are you kidding me? It is at times like this when I can see the value of 'scream therapy'. I cannot believe the bad luck that I'm having with this project.

My task this evening is to see if I can 'fix' it. I am going to be very upset if I can't. Wish me luck.

Sunday, May 22, 2016

Artistic Block

I’m watching lots of art tutorials and admiring the work of so many fabulous artists online. There are so many techniques that I want to try, so many ideas swirling around my head.

But when it comes down to getting started...putting that first bit of paint down onto paper or canvas...I’m totally intimidated. What if it doesn’t look ‘good’? What if I make a ‘mistake’? The world will surely collapse around me! Right?

I know, I can hear you all now. There are no mistakes in art. Art is a creative expression of your thoughts and feelings. There is no wrong or right, no good or bad. Intellectually, I know and understand this.

Try to tell that to my conflicted brain! The right side (creative) and the left side (logical) start to battle as soon as I sit down at the work table in my studio/office. I pull out materials, lay them out in front of me, and freeze.

 When I have been able to suspend belief though, the results have impressed even me. Take this art journal page that I recently did. After watching a video and working on the cat for quite some time, I was going to throw it out. After all, it wasn’t as ‘good’ as the one in the video. And any attempt at 'fixing' it seemed to make it worse.

However, anyone that I shared a photo of it with thought it was fabulous. So, I took a few deep breaths and plunged in. I committed myself to moving forward and finishing the page in spite of my reservations.

Surprising even me, it turned out pretty good. How can I shut down that logical side of my brain more often and allow art to happen as it should?

Sunday, April 10, 2016

ScrapFest In Kitchener

I had such a marvelous time at ScrapFest in Kitchener, ON yesterday! While it was primarily a scrapbook event, a lot of the materials and techniques are transferable to any number of paper crafts, such as artist trading cards and greeting cards.

They had a plethora of free mini workshops. I learned a few things and came home with a bunch of take-aways that I made.

Tags are another popular canvas to create on. This one combined several techniques...painting, stenciling, stamping...to end up with this beautiful tag. The flowers were punched out of card stock, then painted and embellished with a marker. They were applied to the tag with foam dots.

Next came this little embellishment that can be added to a greeting card. The flower was stamped onto card stock, then the co-ordinating die was use to punch it out on a Big Shot. The fancy corners were made with a corner punch and the greeting stamped on. You can't really tell by the photo but the petals of the flower were slightly curled up with a pencil, then a foam dot adheres it to the tag.

This was a really quick and easy project. A bit of Distress Ink applied with a sponge and some rubber stamping with different colours of ink created a very simple but pretty design. it was glued to a kraft bookmark base and a bit of ribbon was added to finish it off.

I learned how to make a little gift bag using heavy-weight scrapbook paper, ribbon, a small circular tag with a word stamped onto it and a bit of glue.

Copic markers and I are never going to be able to work together, at least not in the near future. As lovely as the instructor was, praising my work, clearly I am not skilled at it. It is great to be able to try out new techniques though without investing the money in products that end up not working for you.

Another tag workshop came next. The flowers were flat die-cut spirals that we painted, then rolled, formed and glued into shape. A gem was glued in the centre. The kraft tag was stenciled first, the leaves and flower glued down, and the metallic die-cut greeting added. Some canvas ribbon and string finished this one off.

Here's another interesting project made with heavy-weight scrapbook paper. It is a sleeve or pocket for a gift card. A little bit of glue, a paper doily, a punched out scalloped circle from patterned paper, artificial leaves and flower, along with a hint of bling create a unique and beautiful way to present a gift card for any occasion.

There were long line ups for this mini workshop, and from the end result, I'm sure you can see why. In the afternoon, the crowd thinned out and I was able to get my turn. This Christmas card used a lot of die-cuts and a variety of Distress Ink colours applied with a sponge. It is so simple to do, once you know all the steps and how to put it all together.

For this one, a glossy paper was used. A rubber stamp was coloured with water-based markers then stamped onto the card. I faint background image was then stamped on. The stamped and die-cut butterfly was coloured, and applied with a foam dot.

This small tag was punched out with card stock. The flower was stamped on with Versa-Mark ink. White embossing powder was sprinkled onto it and the heat tool used. Once it cooled down, alcohol ink pens were uses to apply colour to it. I did not realize that you could colour on an embossed image. Add a piece of ribbon and, voila, it's done!

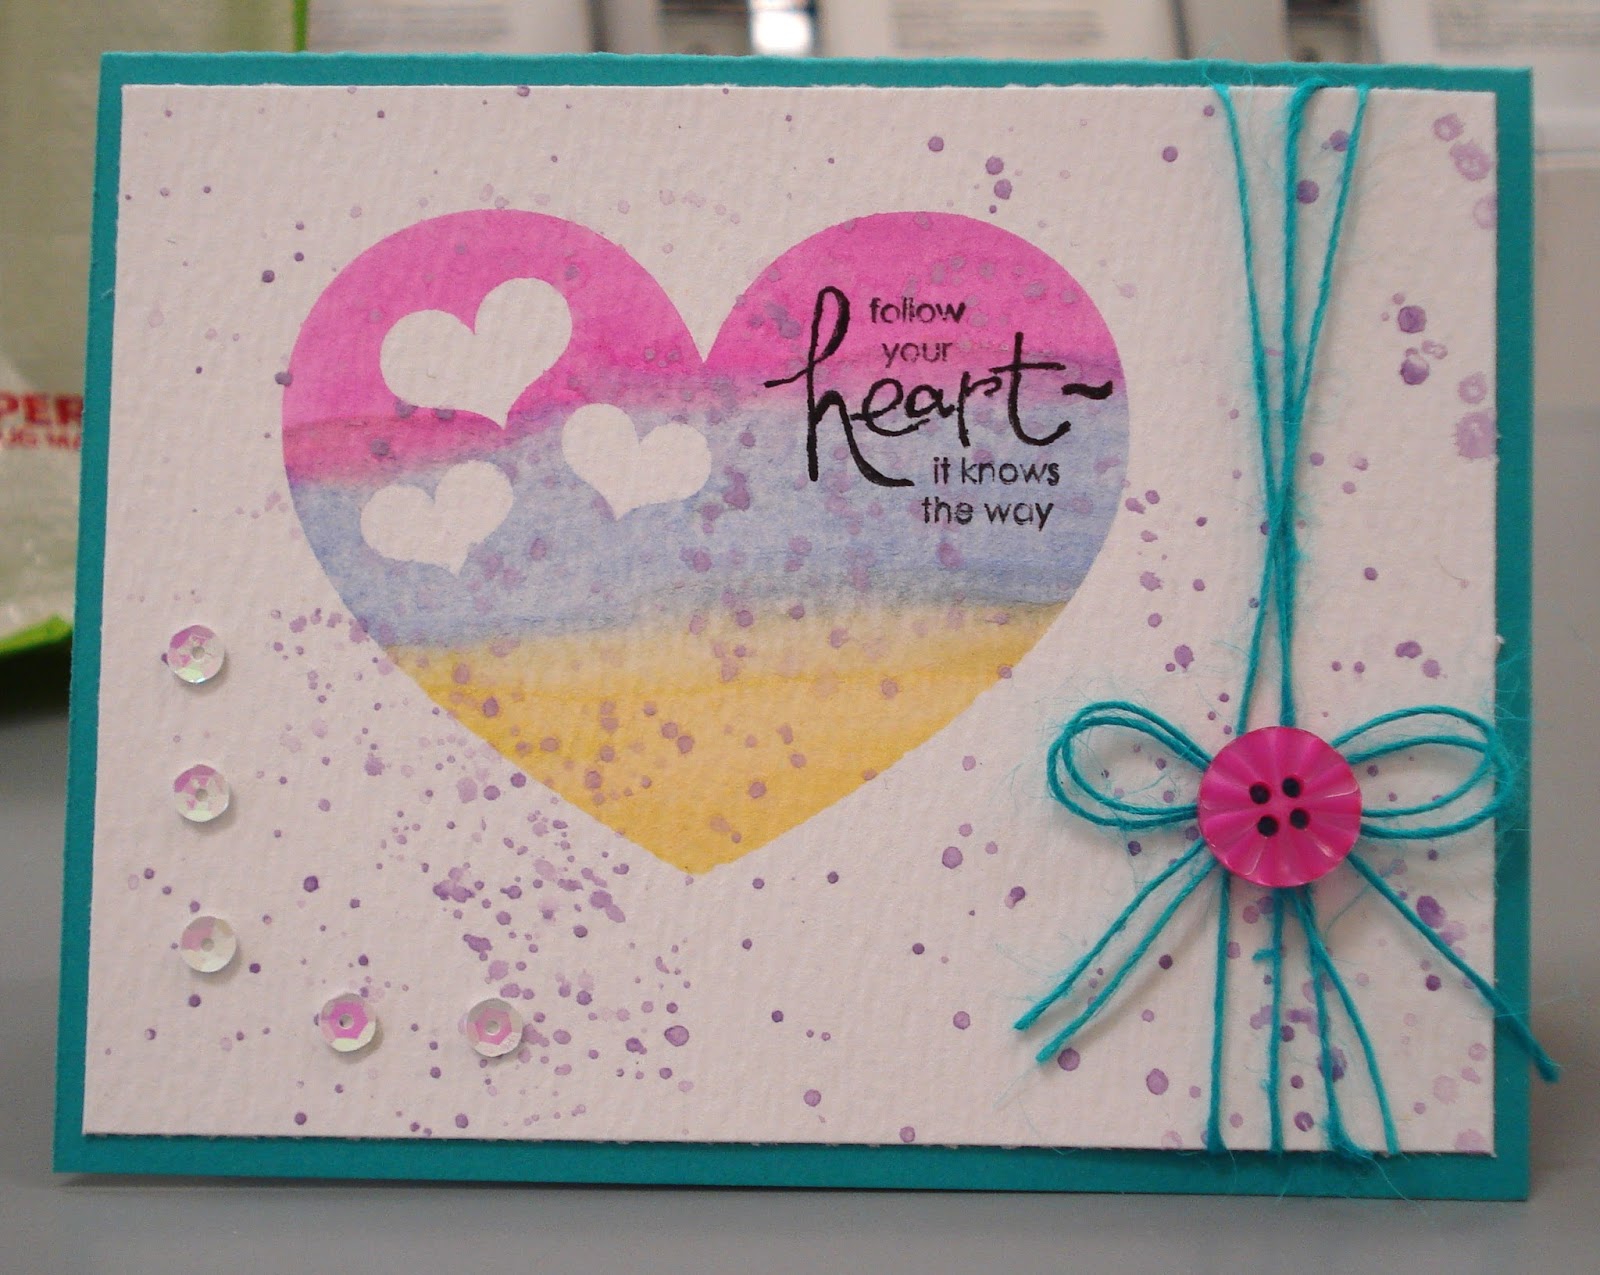
This was the last workshop that I attended. This is on watercolour paper. The hearts were masked off and the paint applied. Once the masks were peeled off, some paint splatters and the stamped sentiment were added. The string was taped on the back and wound around it a couple of times and taped at the other end. A bow was made from the same string and glued down. The button was glued down next, as well as the sequins. The decorated card was glued to coloured greeting card base.

I did not actually end up buying very much at this event but I sure did learn a lot of new techniques and get some wonderful ideas for future projects.

The highlight of the show was getting to spend a bit of time with my friend, Natialie, who was conducting one of the workshops.

I'm already counting down the days until ScrapFest comes to my hometown in September!

Monday, February 29, 2016

Leap Day, 2016

I won't have the opportunity to post on this day (February 29th) for another four years so I thought I should take advantage of it now by looking at some of the customs, traditions and superstitions that are associated with it.

According to an old Irish legend, St. Brigid struck a deal with St. Patrick to allow women to propose to men – and not just the other way around – every four years on February 29th.  This is believed to have been introduced to balance the traditional roles of men and women in the same way that Leap Day balances the calendar.

A man was expected to pay a penalty, such as a gown or money, if he refused a marriage proposal from a woman on Leap Day. In many European countries, the tradition dictates that any man who refuses a woman's proposal on February 29th has to buy her twelve pairs of gloves. The intention is that the woman can wear the gloves to hide the embarrassment of not having an engagement ring. During the middle ages there were even laws governing this tradition.

In Scotland, it used to be considered unlucky for someone to be born on Leap Day. Greeks consider it unlucky for couples to marry any time during a leap year, and especially on Leap Day. In Russia, it is believed a leap year is likely to bring more freak weather conditions and a greater risk of death all around.

How or why some of these beliefs and traditions ever started is lost to obscurity but it was fun looking into some of them on this Leap Day, 2016.